Passion Fruit Spritzer

Spring is FINALLY here which means Summer is just around the corner! With summer on my mind I can’t help but start to daydream about my summer plans. Two thing I absolutely love about summer are BBQ’s and patios! Bring on the burgers and sangria!

Today on Sweet and Saving, I’m sharing my new favorite summer drink recipe that takes under 2 minutes to make, is light, refreshing, and oh so good! My obsession with passion fruit started a year ago while down in Jamaica. From the first time I had it, I was HOOKED! Passion Fruit is the sweet like candy and has some amazing health benefits. For one, passion fruit boosts the immune system, but it’s also known to aid in digestion, keep skin hydrated and glowing, improve blood circulation, improve bone and eye health, and protect against cancer and heart disease. It’s no wonder I became obsessed with this little miracle fruit.

Passion Fruit Spritzer RecipePassion Fruit Spritzer RecipePassion Fruit Spritzer Recipe

Ingredients

1/2 Cup of ice

1 Passion fruit (I buy mine from Farm Boy)

Mint leaves

Sparkling Water

YES…4 ingredients is all you need!

Directions

Fill your favorite cocktail glass with 1/2 cup of ice

Cut passion fruit in half and scrape out all the fruit and seeds into the glass

Add a handful of fresh mint leaves

Fill the glass with sparkling water

To add some kick add 1 shot of vodka (don’t forget to drink responsibly!).

The final step is to sit back and enjoy!

Passion Fruit Spritzer Recipe

Click to shop my favorite summer cocktail glasses!

glasses1

Xo,

Liv


Happy 1 Year Anniversary Sweet and Saving!

I can’t believe it’s already been 1 year since I launched Sweet and Saving. The blog has undergone many changes since May 1st, 2017. For those who are new to following the blog, it started off as “The Accountant’s Wife”, a blog focused on topics related to finance and accounting. Well, it turns out (not to my surprise) that I HATED writing about money, it was so BORING! And apparently you thought so too, because once I started blogging about fashion, food, decor and lifestyle topics (aka interesting topics), I saw a massive jump in my engagement! In February I did a complete blog re-brand and Sweet and Saving was born. Here I talk about about affordable ways to enjoy sugar (food), price (fashion and decor), and everything nice (lifestyle).

As we celebrate 1 year of Sweet and Saving (and the Accountant’s Wife), I wanted to share some exciting success stories of the blog. In year 1 we had almost 10,000 views, 4,000 visitors, and over 1,300 people are currently following the blog! I am SO thankful for all your support and for following me along my blogging journey. To celebrate 1 year with the blog I’ve rounded up YOUR blog favorites from the past year… Drum roll please!

#1 Want vs. Need – How we Paid off $40,000 of Debt in 16 Months!

#2 10 Items to Buy At Costco

10 items to buy at costco

#3 5 Nutrition Myths You Should Stop Believing Right Now

dc99a4eb-acfd-4e86-b03a-60085b4b7c33

#4 10 Things NOT To Spend Your Money On

Processed with VSCO with e3 preset

#5 7 Brides & How They Saved On Their Weddings

10514750_257989071076122_5936755742784948655_n

#6 10 Date Night Ideas That Won’t Break the Bank

shutterstock_655138546

#7 20 Things I’ve Learned In My Twenties

birthday


#8 How To Make Your Wardrobe Go Further: The Denim Jacket

7476486a-06bb-482c-8694-af28e1ea91fd

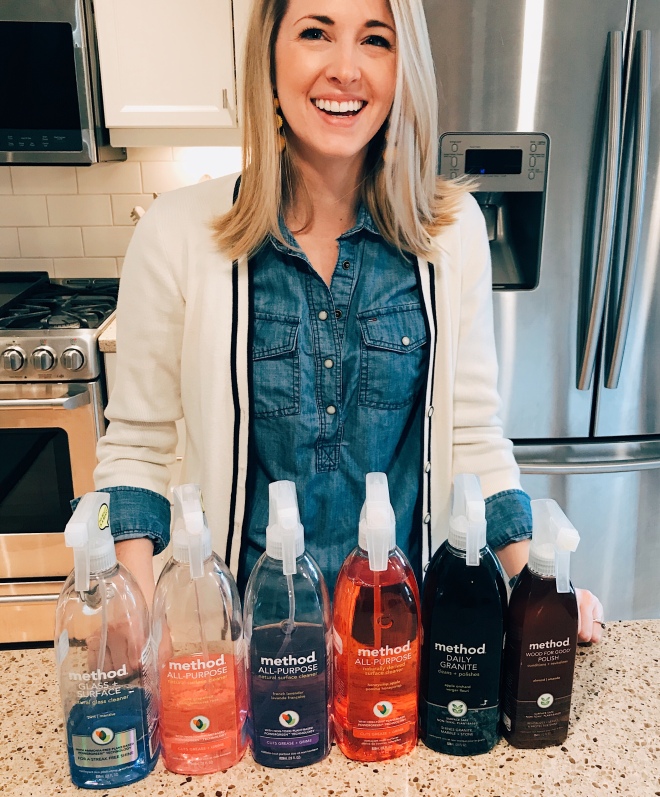
#9 Selecting Cleaners For Your Home Part 1: Back To The Basics

2b2c2f3b-551d-4c1b-80a1-3e69beb6f1f4

#10 10 Tips for Getting into a Routine

22e4ee73-966f-4fe5-85ad-73bb30027a30

I am very much looking forward to another year of blogging. But with a new year comes new goals. I’m hoping to get more personal and vulnerable with you guys, and work on developing really meaningful content with the purpose to encourage and empower. My goal is not to get more views or more visitors, I’m not here to make money, I’m simply here to share my thoughts, my insights, and provide a fun space for creativity and sharing.

Thanks for following along!

xo,

Liv


5 Nutrition Myths You Should Stop Believing Right Now

Hi everyone, I am so excited to be a guest blogger on Sweet and Saving! My name is Megan Kuikman and I am a Registered Dietitian. As a Registered Dietitian, I come across nutrition myths on a daily basis. Thanks to social media and so-called experts in nutrition, these myths travel like rapid fire. Read on for the top 5 nutrition myths that I come across:

1. Carbs make you fat

When calorie intake is the same, weight loss can be achieved on either a high carbohydrate or low carbohydrate diet. Excess calories lead to weight gain regardless if the excess calories come from carbohydrates, protein, fat, or alcohol. There is no reason to avoid good sources of carbohydrates such as fruit, whole grain breads, pasta, potatoes and milk products. Carbohydrates are an importance source of fiber, vitamins, and minerals and are critical for brain function.

2. Honey and maple syrup are better than table sugar since they’re natural

Nutritionally, honey, maple syrup and sugar are all the same. Honey contains 64 calories/tablespoon and maple syrup 52 calories/tablespoon compared with 49 calories/tablespoon in table sugar. All are concentrated sources of calories with few added vitamins and minerals. Just because something is made with maple syrup or honey does not mean it’s a better choice. Choose whatever sweetener you find tastes best, and enjoy it in moderation.

3. You need to take a vitamin or mineral supplement

Taking a vitamin or mineral in an isolated supplement is not as healthful as getting them naturally from food. This is because vitamins and minerals work together to create a larger health benefit than they can make on their own. Many health boosters have also not been fully identified and can’t be reproduced in pill form. Taking a supplement can also be dangerous since high doses can be toxic or create a deficiency in another nutrient. There are of course some exceptions such as correcting a nutrient deficiency, a vitamin D supplement during the winter, or special population groups.

4. Protein shakes are necessary after a hard workout

While protein is important after a hard workout to help repair damaged muscle, protein needs can easily be met through foods alone such as yogurt, milk, meat, legumes, and nuts. Protein is also not the only important nutrition post-workout. Carbohydrates are of equal value. Most protein shakes do not contain carbohydrates. If you do choose a protein shake post-workout, be sure to pair it with a carbohydrate rich food such as a piece of fruit or bagel.

5. If Dr. Oz said it then it must be true

Be careful where you get your nutrition advice. There are a lot of so called “experts” in nutrition who are not providing evidence based nutrition advice. Remember a nutritionist is not the same as a Registered Dietitian. The designation “Registered Dietitian” in Canada is a regulated and protected title. This ensures that the advice and information they provide is sound.

28907156_10160267157895096_24816566_nMegan Kuikman is a Registered Dietitian offering one-on-one nutrition counselling in Brantford and surrounding area or via Skype or phone call. Megan completed her undergraduate degree at Western University before completing the London Health Sciences Centre dietetic internship. Megan is also an accomplished long-distance runner. She was ranked 16th fastest Canadian woman marathon in 2017 and placed 6th at the 2017 Canadian marathon championships.  If you would like to work with Megan, go to her website: megankuikmanRD.ca

Easy, Delicious Pad Thai in Under 40 Minutes

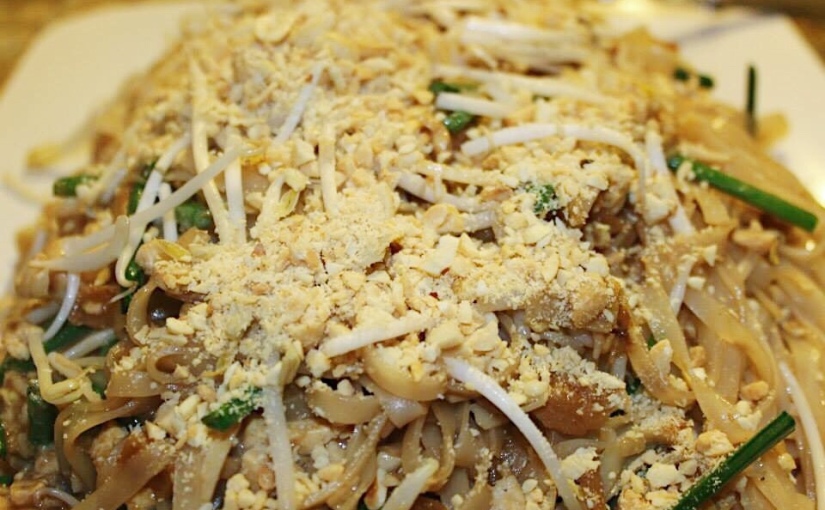
It’s kind of comical that I have a food section on my blog, because those who know me know that I actually hate to cook. I was spoiled growing up with a mom who had a passion for food and made us gourmet meals. So while I have an appreciation for great taste and flavors, I have ZERO desire to put in the time or effort which is why I am always looking for quick meals that taste great. Tonight I’m sharing my quick and easy go-to Pad Thai recipe that the whole family will love. And the best part? It takes less than 40 minutes to make which includes soaking the noodles for 30 minutes! This recipe yields 4 servings.

2367a752-bf77-4df8-8a44-3c7c601eff85b2835ad8-b999-41dc-980d-10fce7f32e42

What You’ll Need

  • 1 package of “A Taste of Thai”  Pad Thai sauce
  • 1/2 package of “A Taste of Thai” Pad Thai noodles
  • 4 tbsp vegetable oil (I use avocado oil)
  • 1 egg
  • 2 chicken breasts (or you can substitute shrimp or pork)
  • 4 scallions, chopped
  • 1/2 cup coarsely chopped peanuts (plus extra to sprinkle on top)
  • 2 cups of bean sprouts
  • Hot sauce
  • Cilantro and lime for garnish

Steps:

Soak the Pad Thai noodles in hot tap water for 25-30 minutes (do not over soak the noodles).

While the noodles are soaking thinly slice the chicken breasts and set to the side.

Prepare chopped scallions, peanuts, and cilantro.

When the noodles have been soaking for about 25 minutes, heat 2 tablespoons of the oil in a wok or large skillet over medium heat.

Add the egg and lightly scramble (approximately 20 seconds).

Add chicken and stir-dry until cooked through.

Add the remaining 2 table spoons of oil, then rice noodles, and stir-fry for 4-7 minutes until firm but tender.

Add the scallions, peanuts, and Pad Thai sauce. Stir for 1 minute.

Stir in bean sprouts.

Drizzle on some hot sauce, cilantro, extra peanuts, and lime wedges.

The last step is to enjoy your food and the extra time you have on your hands!

xo

Liv


The Perfect Banana Bread

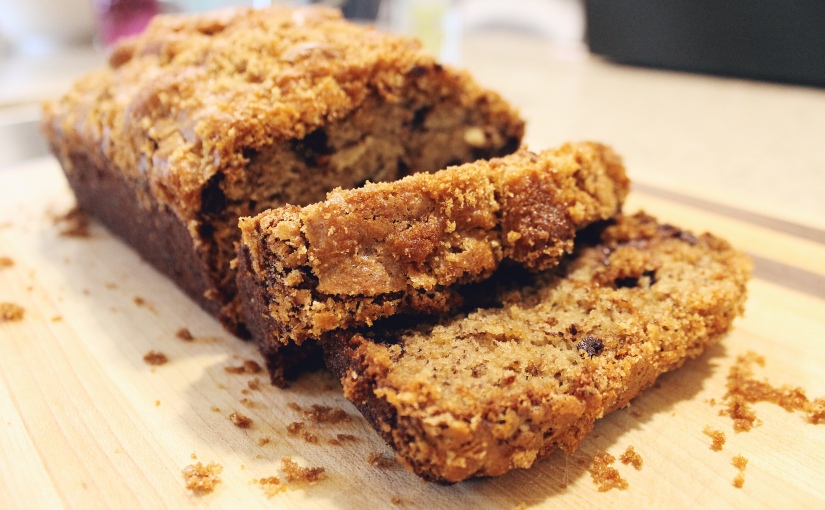
Who doesn’t adore a warm slice of banana bread fresh out of the oven? I love banana bread for SO many reasons. It’s the perfect snack to quickly whip up for last minute company, it’s super easy to make, and it uses most of the ingredients lying around the pantry. Today I am sharing my go-to banana bread recipe. Warning this recipe is NOT healthy, gluten free, or vegan but that’s what makes it taste oh so good!

0e63b08f-8d98-41cc-aef8-e7ebd5db1f7cb9e596c7-751c-40c5-adcd-5d8b5cb9851976178533-afe4-4e04-8b51-cad078904cf7aca6e3ed-1ea9-4e67-8572-054421b08d13a6521ef9-8ea7-479f-91e0-80fb92d59f0362b77a71-f33b-4885-b8fd-1fcd81ad81ee6da3acca-6920-40af-a33a-d498868a541189701133-c93d-49e8-8f51-e3f8f2df434e

Ingredients

1/2 cup of butter

1/2 cup of brown sugar (plus 1/4 cup extra for the crunchy top)

1/2 cup of granulated sugar

2 eggs

3 bananas

1 1/2 cups of flour

1 teaspoon of baking soda

1/2 teaspoon of salt

1/2 teaspoon vanilla

1/2 chocolate chips

Directions

Preheat over to 350F/180C

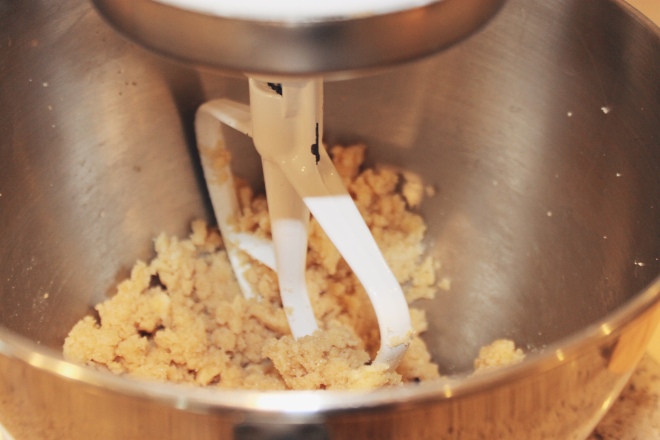
Cream together butter and sugar

Add eggs and bananas (I use frozen bananas and microwave them for 30 seconds before adding them to the mixing bowl)

Mix well

Sift flour, baking soda, and salt. Add to the creamed mixture.

Add vanilla and mix well

Add chocolate chips and mix well

Pour mixture into greased loaf pan.

To get the crunchy top, take the extra 1/4 cup of brown sugar and gently sprinkle it on top of the batter. Using your fingers, slightly press the sugar into the batter.

Bake for 55 minutes.

The last step is to enjoy! Goes well with a fresh cup of coffee, friends, and laughter.

xo

Liv


BIG ANNOUNCEMENT

As a marketer, it’s essential that every decision I make for my marketing material is backed by data. And that is precisely the beauty of digital marketing. Everything is tracked, and I can see deep into the analytics allowing me to make improvements to my content. Well, when it comes to my blog what my analytics told me is that YOU are much more interested in my lifestyle posts rather than the posts that are specific to accounting and finance (and I don’t blame you, that stuff is borrrinnggg).

So…if you haven’t already noticed, a couple of weeks ago I gave my blog a new face lift. With a new sleek design, this was only phase one of my transition. I am so excited to announce that I’ve re-branded The Accountant’s Wife to incorporate more of the topics that I LOVE to write about: lifestyle, fashion, food, and home décor. Introducing (drum roll) Sweet and Saving: Sugar, Price, and Everything Nice!

It’s no secret that I have champagne taste. Unfortunately, my purse strings (and husband) can’t keep up with how fabulous I wish to be. Luckily, I’ve adopted my mother’s discount seeking ways to help me enjoy my champagne taste but on my beer budget, all without compromising on quality. The NEW and IMPROVED blog is here to provide money saving tips and tricks on all things pretty and sweet. I’ll be linking all my favorite finds so you can shop along side with me. Of course, I will still be blogging about finance and accounting in “Money Talk” and will aim to make it as practical as possible.

You may be wondering why the change in name? I originally decided on The Accountant’s Wife because I was going to be the voice for my hubby who provided me with all the financial insight. But the more invested I became in the blog, the more I came to recognize my own voice and that I too have opinions and advice to share. So the new blog name is just that…my voice. Sweet and Saving takes a fun play on Sweet and Savoury (because if you know me at all, I am a little sweet mixed with A LOT of spice, just ask my husband). And my new tag line perfectly describes the focus of my new blog content (sugar = food, price = savings, everything nice = fashion and décor).

I am SO excited about the new and improved blog and just want to thank all my loyal followers for reading and sharing my posts each week. I love you all!

Processed with VSCO with m6 preset
Top is from one of my new favorite brands Naked Zebra. I’ve linked a similar style HERE

xo

Liv

The Perfect Charcuterie Board for Under $45.00

I love charcuterie for so many reasons. It makes the perfect appetizer and it’s filling enough to use as a tasty meal. For under $50 I’m going to show you how to make one boss of a charcuterie board that’s big enough to feed at least 4 people.

First, the ingredients. Charcuterie boards are all about texture and a mixture of flavors that compliment each other. I start by selecting my cheeses. Something creamy, something bold, and something rich. Next, I select my protein. I typically go with two different proteins, one salty and one spicy. Now it’s time to select your accents. Something that adds color and a different flavor to your charcuterie. And finally, for the base I  like to do a mix of crackers and bread.

How to make a boss Charcuterie board for under $45
I’ve linked my shirt HERE

Here is my charcuterie go to ingredient list:

Cheese

  • Brie – $5.00
  • Gouda – $5.00
  • Provolone – $5.00
  • Bocconcini – $4.47

Protein

  • Prosciutto – $5.00
  • Cervelat salami – $7.00

Accents

  • Pepperoncini peppers – $3.00
  • Basil – $3.00
  • Arugula – $3.47

Base

  • Baguette – $1.00
  • Our Finest premium cracker selection – $3.00

The Process

When it comes to charcuterie, presentation is everything. I start by arranging my cheeses, showcasing them on different sides of the board. My favorite thing to do with provolone is arrange it into horn shaped flowers. It’s almost too pretty to eat! Next, I focus on my proteins. Arrange them next to the cheeses that would best compliment the flavors (such as prosciutto and Gouda). Following the protein, layout your bases around the board so your guests can easily build their plate no matter what side of the board they are standing on. Finish off your charcuterie board with colorful accents such as basil, arugula, grapes, olives, peppers, etc.

How to make a boss Charcuterie board for under $45How to make a boss Charcuterie board for under $45How to make a boss Charcuterie board for under $45

You’re Almost Done

Your charcuterie board is almost complete. Compliment your board with a plate of olive oil and balsamic vinegar for the bread (and cheeses such as mozzarella and bocconcini). Finally, if you wish, pair your charcuterie board with the perfect wine pairing. For red I recommend J. Lohr’s Cabernet Sauvignon and for white I think Toasted Head’s Chardonnay is the perfect compliment.

How to make a boss Charcuterie board for under $45

And voila! The perfect charcuterie board. Enjoy!

Liv

8 Meals in Under 1 Hour (& under $100!)

I LOVE routine and with all our moving around it’s been a challenge getting back into the swing of things. Well a month later I’ve finally found my new groove! Work, Gym, Dinner, Bed. But by the time I get home the last thing I want to do is make dinner (sooo tired!). And after spending an hour at the gym crushing some killer calories, my hunger level is “hangry” and naturally I want to eat right away. The constant time crunch I’m under always has me searching for healthy and easy dinner recipes that don’t take an hour to make. Well I’ve search Pinterest high and low and many pins later, I finally came across my new go-to meal plan. In under an hour I prepared 8 different meals (ahhhh-mazing!) and all the groceries I needed cost under $100! What I also love about these meals is the variety. They can be cooked in the crock pot, stove top, or oven, you can use different proteins, and you can choose different side dishes (salad is always my go-to). And for my gluten free and dairy free friends, you can enjoy this meal plan to!


After a number of requests I am so excited to share Kelly McNeil’s “Eight Healthy Freezer Crock Pot Meals in 45 Minutes” (which actually took me 60).  Included in this meal prep:

·         Beef/chicken fajitas (1 chicken and 1 beef and my personal favourite)

·         Italian beef/chicken and veggies (1 chicken and 1 beef)

·         BBQ beef/chicken and carrots (1 chicken and 1 beef)

·         Honey Dijon beef/chicken and red potatoes (1 chicken and 1 beef)

You can get the meal prep plan HERE which includes a grocery list saving you even more time.

A little bit of what you’ll need:

If you have any healthy time saving (and budget friendly) recipes let me know and I will give them a try (who knows, they may even make it on the blog!).

Liv